Quick Start
Learn the essentials of mahpastes in under 5 minutes.
Your First Clip
Method 1: Paste from Clipboard
- Copy something to your system clipboard (text, image, or file)
- Focus the mahpastes window
- Press Cmd + V
The content appears as a clip in your gallery.
Method 2: Drag and Drop
- Drag any file from Finder
- Drop it onto the mahpastes window
Multiple files can be dropped at once.
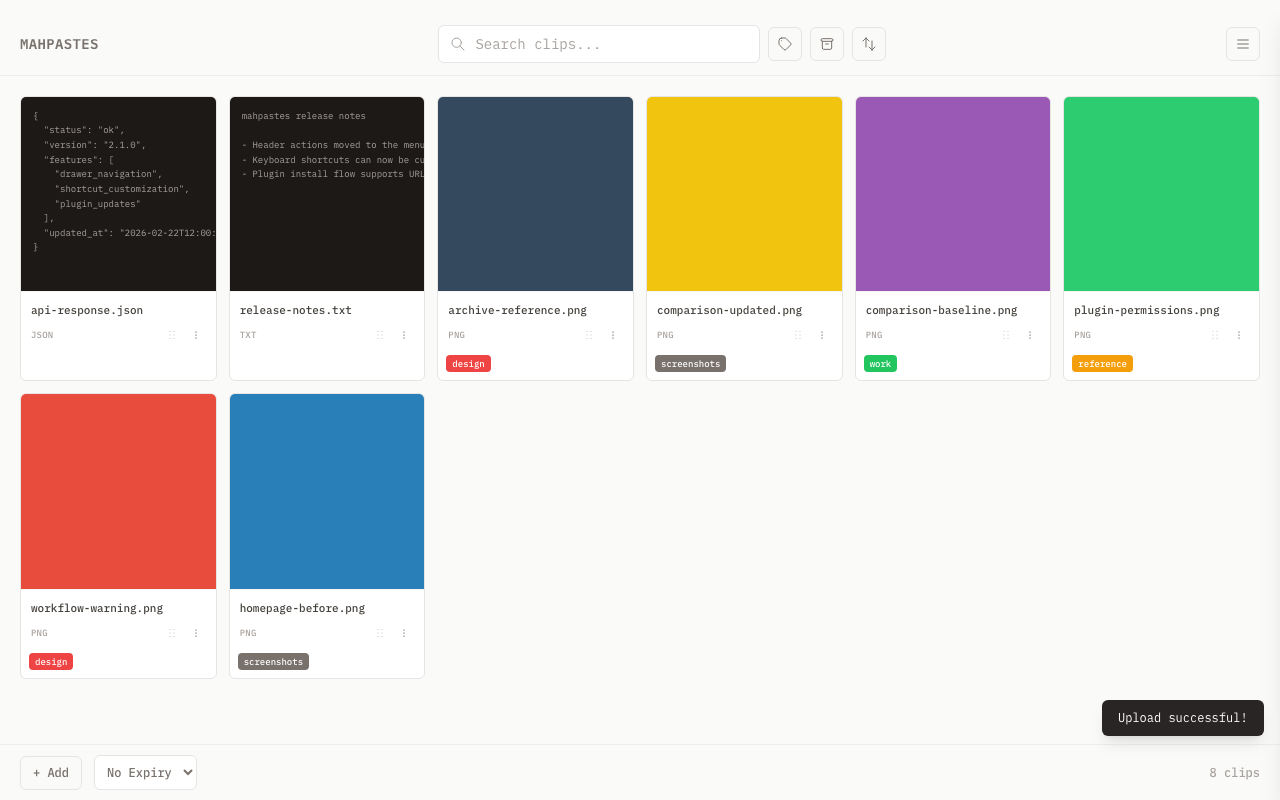
Understanding the Gallery
The main window shows your clips in a grid layout:
- Images display as thumbnails
- Text/Code shows a preview of the content
- Files show the filename and type icon

The bottom bar shows the clip count, an + Add button, and an expiry dropdown for new uploads. Sort options are in the header bar next to the search field.
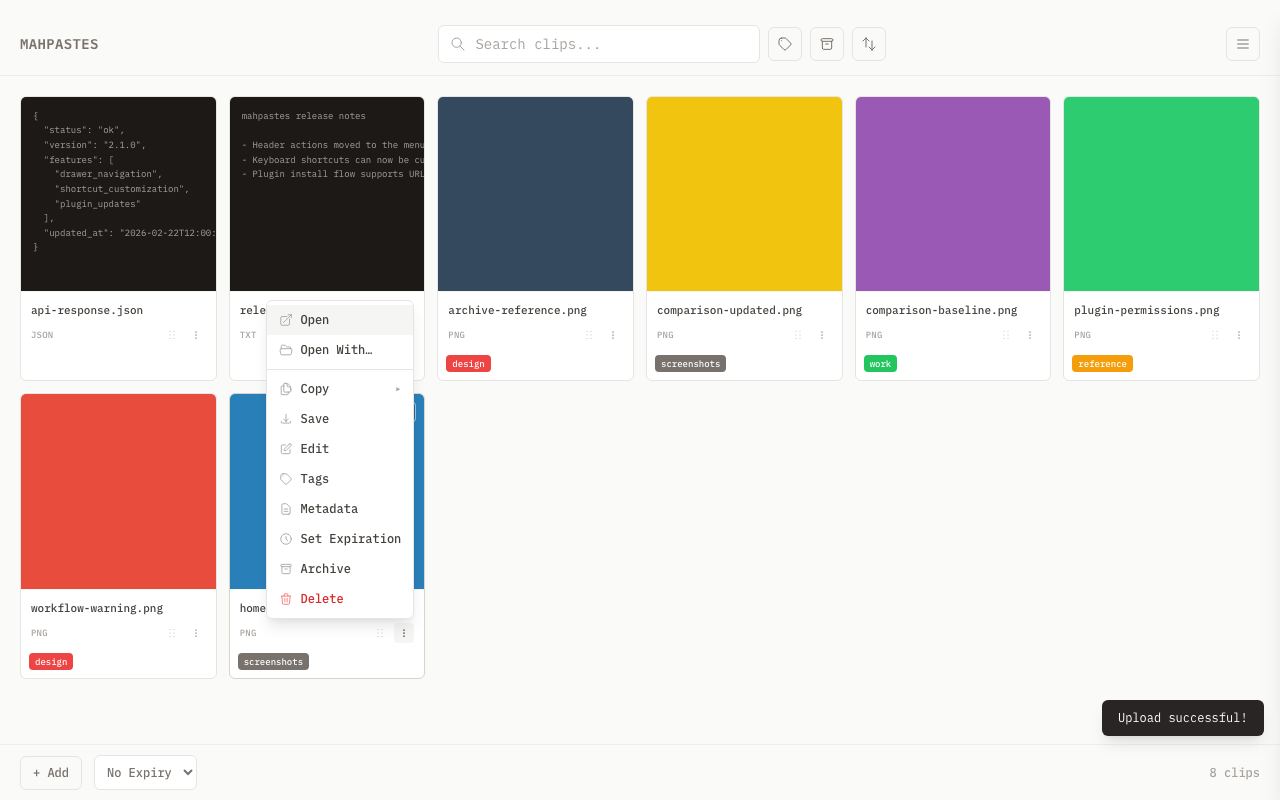
Clip Actions
Open the clip context menu (three dots on each card) to access actions:
| Button | Action |
|---|---|
| Open | Open with your default application |
| Open With... | Choose an application to open this clip |
| Copy | Submenu with Path (temp file path), File (file to clipboard), and Contents (for text, JSON, and images) |
| Save | Open the native save dialog and export a copy to disk |
| Edit | Open supported image, text, or JSON clips in the built-in editor |
| Tags | Add or remove tags |
| Metadata | View and edit file metadata |
| Rename | Change the filename |
| Set Expiration | Schedule auto-deletion after a time period (or cancel an existing expiration) |
| Archive | Move to archive (or Restore in archive view) |
| Merge Duplicates | Merge identical copies when duplicates exist |
| Delete | Remove permanently |
Working with Clips
Copy Back to Clipboard
Use a clip's three-dot menu and choose Copy -> Contents, then paste it anywhere.
For images in the lightbox, Cmd/Ctrl + C also copies the active clip contents.
Copy Path
Need to reference a file in terminal or another app? Use Copy Path:
- Open the clip menu (three dots)
- Open Copy -> Path
- mahpastes creates a temporary file
- The file path is copied to your clipboard
- Paste the path wherever you need it
Temp files created by Copy Path are leased temporary files. mahpastes cleans them up periodically and again when the app exits.
Search and Filter
Use the search bar to filter the clips currently shown in the gallery:
- Type a filename to find specific clips
- Search by file type or MIME text (for example
imageortext/plain) - Results update instantly
Clip Expiration
Set per-clip expiration at upload time using the bottom bar dropdown, or on existing clips via the context menu. Presets: 15 minutes, 1 hour, 6 hours, 24 hours, 7 days.
See Auto-Delete for details.
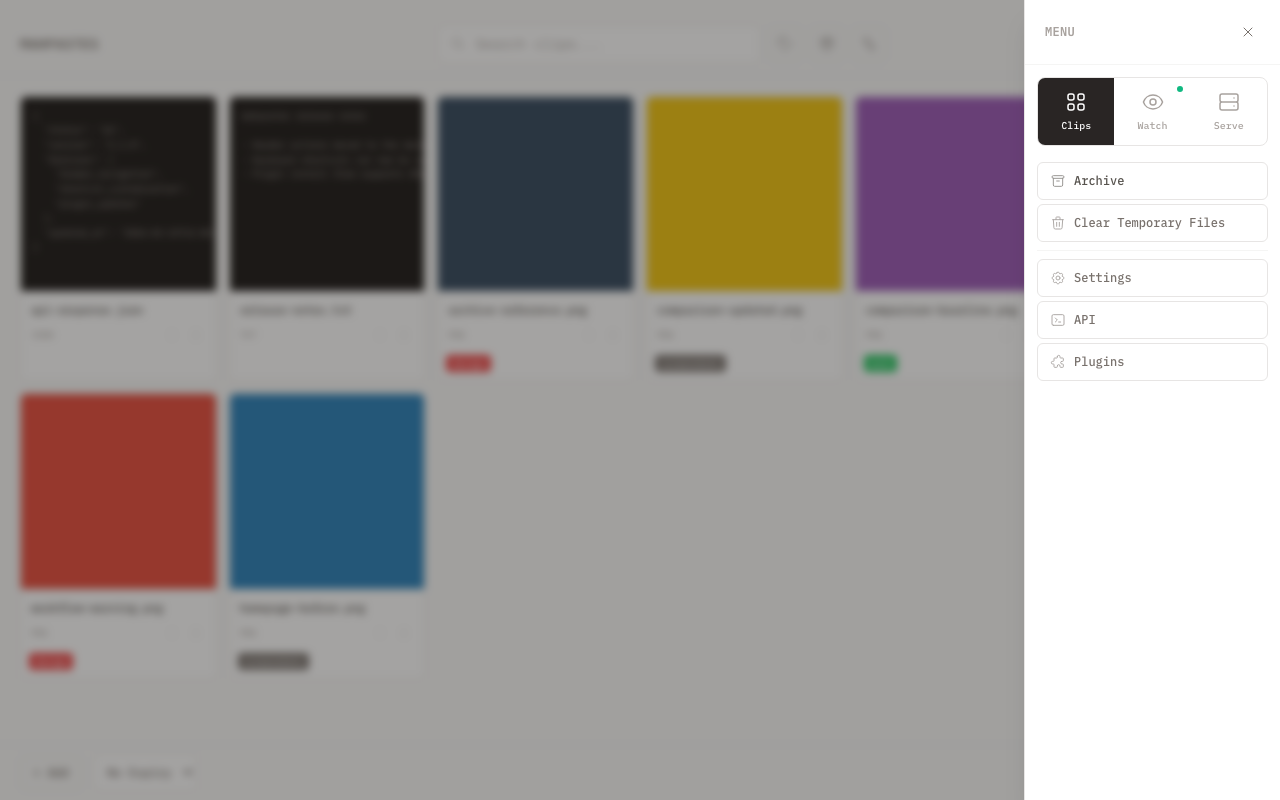
Using the Archive
The archive keeps important clips separate from your active workspace.
Archive a Clip
Open a clip's three-dot menu and click Archive. It moves to the archive section.
View Archived Clips
Click the Archive button in the header, or open the menu drawer (M) and click Archive, to see archived clips.
Unarchive
In Archive view, open a clip's menu and click Restore to move it back to the main gallery.
Editing Clips
Edit Images
- Open an image clip's menu and click Edit
- Use the toolbar to annotate:
- Select — Select and move annotations
- Crop — Crop the image
- Brush — Freehand drawing
- Eraser — Erase drawn content
- Line — Draw straight lines
- Arrow — Draw arrows
- Rectangle — Draw rectangles
- Circle — Draw circles
- Text — Add text annotations
- Anonymize — Pixelate a region
- Eyedropper — Pick a color from the image
- Click Save to overwrite the original clip, or Save As to create a new clip with your edits
Edit Text
- Open a text clip's menu and click Edit
- Modify the content in the editor
- Click Save to overwrite the original, or Save As to create a new clip with the changes
Bulk Operations
Select multiple clips for batch operations:
- Click the checkbox on each clip you want to select You can also Shift-click checkboxes to select a range.
- Use the bulk action bar that appears:
- Compare — Compare two selected images side-by-side (visible when exactly 2 images are selected)
- Tag — Add or remove tags from selected clips
- Expire / Clear Expiry — Set or remove expiration on selected clips
- Copy — Copy selected clips as files to system clipboard
- Download — Save the selected clips as a ZIP file via the native save dialog
- Archive — Move selected to archive
- Delete — Remove all selected
Keyboard Shortcuts
Essential shortcuts for power users:
| Shortcut | Action |
|---|---|
| Cmd + V | Paste from clipboard |
| Cmd + C | Copy clip contents (lightbox) or copy selected clips as files (gallery) |
| Esc | Close modal/dialog |
| Cmd + Z | Undo (in editor) |
| Cmd + Shift + Z | Redo (in editor) |
| Cmd + S | Save As (in editor) |
See all shortcuts in Keyboard Shortcuts.
Folder Mode
Press F to switch the gallery into folder mode. Tags act as directories -- each tag shows only its directly tagged clips, and child tags appear as navigable sub-folders. Uploading a clip while inside a folder automatically tags it with that folder's tag.
CLI for Power Users
The mp command-line tool gives you full access to mahpastes from a terminal. Upload clips, manage tags, run bulk operations, and script workflows against the REST API.
mp clip list               # List recent clips
mp clip upload photo.png   # Upload a file
mp tag list                # List all tags
See Installation for setup instructions.
What's Next?
- Set up Watch Folders for automatic imports
- Learn about Image Comparison
- Read the full Features guide