Image Editor
Annotate and modify images directly within mahpastes. Supports highlights, shapes, text, freehand drawing, cropping, selections, anonymization, and transform operations -- all without leaving the app.
Opening the Editor
- Click the menu button (three dots) on any image clip and select Edit, or select Edit from the lightbox Actions menu
- The editor opens full-screen with the image loaded on a canvas
- Use the toolbar to select tools and options
Clicking an image preview opens the lightbox, not the editor. Use the context menu or lightbox Actions menu to open the editor.
Drawing Tools
Brush Tool
Freehand drawing for annotations and highlights.
| Property | Options |
|---|---|
| Stroke width | 1--50 pixels |
| Color | Any color via picker |
Tips:
- Use thin strokes for underlining
- Use thick strokes for emphasis
- Hold steady for straight-ish lines
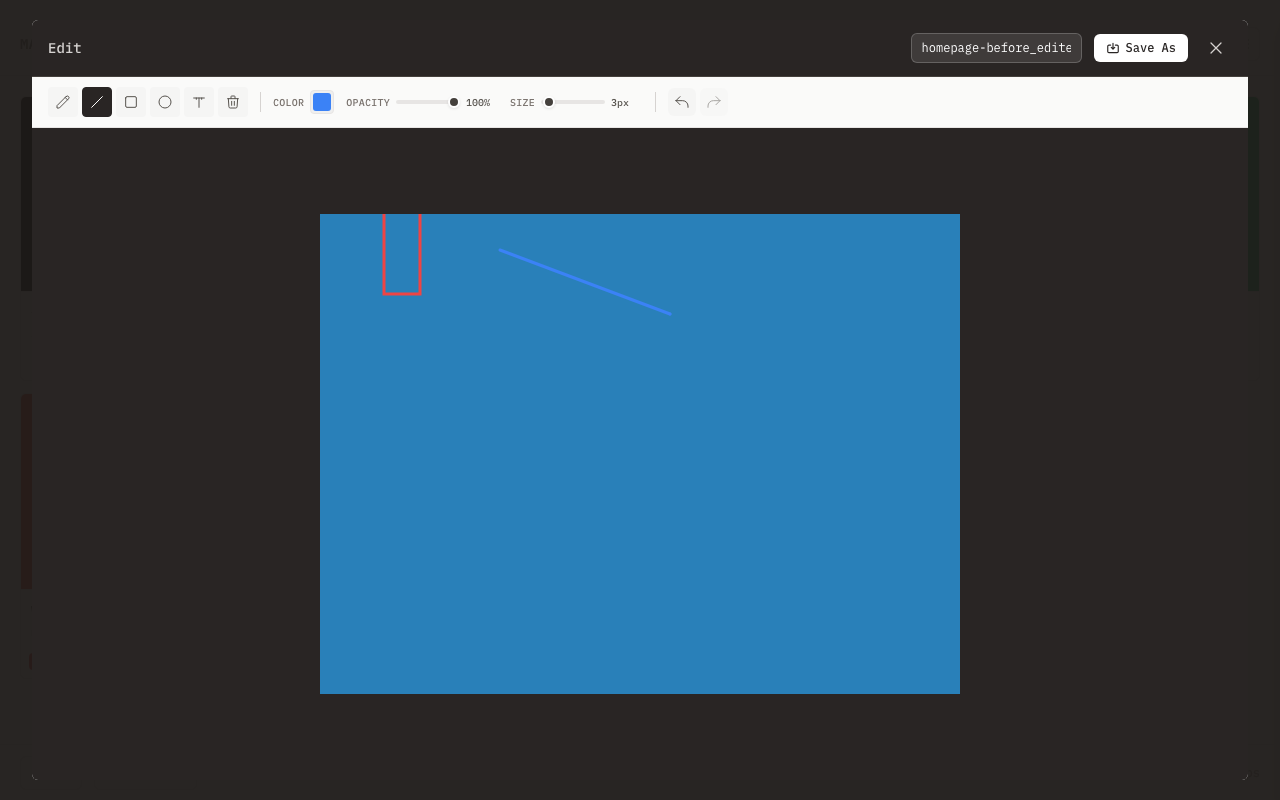
Line Tool
Draw precise straight lines.
| Property | Options |
|---|---|
| Stroke width | 1--50 pixels |
| Color | Any color via picker |
How to use:
- Click to set start point
- Drag to endpoint
- Release to complete
Hold Shift while dragging to snap the line to 45-degree increments.
Arrow Tool
Draw a line with an arrowhead at the endpoint. The arrowhead scales proportionally with the stroke width.
| Property | Options |
|---|---|
| Stroke width | 1--50 pixels |
| Color | Any color via picker |
How to use:
- Click to set start point
- Drag to endpoint
- Release to complete -- the arrowhead appears at the endpoint
Hold Shift while dragging to snap to 45-degree increments. While dragging, a dashed preview shows the arrow before you commit it.
Rectangle Tool
Draw rectangles for highlighting areas.
| Property | Options |
|---|---|
| Stroke width | 1--50 pixels |
| Color | Any color via picker |
| Fill | Outline only |
While dragging, a dashed preview shows the shape before you commit it.
Circle Tool
Draw circles from center.
| Property | Options |
|---|---|
| Stroke width | 1--50 pixels |
| Color | Any color via picker |
| Fill | Outline only |
How to use:
- Click to set center
- Drag outward to set radius
- Release to complete
While dragging, a dashed preview shows the shape before you commit it.
Text Tool
Add text labels and annotations.
| Property | Options |
|---|---|
| Font | Arial, sans-serif |
| Font size | Independent setting, default 16px |
| Color | Any color via picker |
How to use:
- Click where you want text
- A text input appears at that position
- Type your annotation
- Press Enter or click elsewhere to commit
- Press Esc to cancel without committing
The font size is controlled by a separate input in the toolbar, independent of the brush size slider.
Eraser Tool
Remove annotations by restoring the original image pixels.
| Property | Options |
|---|---|
| Size | 1--50 pixels |
The eraser restores pixels from the original image (the state when you first opened the editor). It removes only your annotations -- it does not erase to transparency or destroy the underlying image.
Eyedropper Tool
Sample a color from any pixel on the canvas.
How to use:
- Click on any pixel in the image
- The sampled color is set as the current drawing color, and the color picker updates to match
- The editor automatically switches back to your previous tool after sampling
This is useful when you want your annotations to match a color already present in the image.
Selection and Transform Tools
Select Tool
Create rectangular pixel selections that you can move, resize, duplicate, copy, paste, and delete.
How to use:
- Click and drag to create a selection rectangle
- The selected region is lifted from the canvas (the area underneath becomes transparent)
- Drag inside the selection to move it, or drag the 8 handles to resize
- Press Enter to commit the selection at its new position
- Press Esc to cancel and restore the original
A marching-ants border shows the active selection boundary.
Selection operations:
| Action | How |
|---|---|
| Move | Drag inside the selection |
| Resize | Drag one of the 8 handles (corners or edge midpoints) |
| Constrain to square | Hold Shift while creating a selection |
| Duplicate | Hold Alt and drag to place a copy |
| Select all | Cmd/Ctrl + A |
| Copy | Cmd/Ctrl + C (internal clipboard) |
| Paste | Cmd/Ctrl + V (pastes at center) |
| Delete | Delete or Backspace (clears the region to transparency) |
Copy and paste use an internal editor clipboard, separate from the system clipboard. You can copy a selection and paste it multiple times within the same editing session.
Crop Tool
Crop the image to a specific region with optional aspect ratio constraints and rotation.
How to use:
- When you activate the Crop tool, an initial crop rectangle appears covering 80% of the canvas
- Drag the 8 handles (corners and edge midpoints) to adjust the crop region
- Drag inside the rectangle to reposition it
- Click outside the rectangle to start a new crop region from scratch
- Click Confirm (or press Enter) to apply the crop
- Click Cancel to discard
Crop features:
| Feature | Description |
|---|---|
| Aspect ratio presets | Free, 1:1, 4:3, 3:2, 16:9 |
| Swap orientation | Switch between landscape and portrait for the selected ratio |
| Rotation slider | Straighten the image before cropping |
| Rule-of-thirds grid | Composition guidelines shown inside the crop region |
| Dimensions label | The current crop width and height in pixels, displayed below the region |
| Marching ants | Animated border to distinguish the crop boundary from the image |
After confirming a crop, the canvas resizes to the cropped dimensions and the editor switches back to the Brush tool.
Anonymize Tool
Obscure sensitive information by pixelating or blurring regions of the image.
Modes:
- Brush mode -- paint over areas freehand to anonymize them as you drag
- Rectangle mode -- drag to define a rectangular area, and the effect is applied when you release
Effects:
- Pixelate -- replaces the region with blocky pixelated blocks
- Blur -- applies a Gaussian-style blur to the region
Both effects add random noise to the result to prevent reversal.
The block size for pixelation and the blur radius are controlled by the brush size slider.
Transform
Rotate and flip the entire image using the toolbar buttons.
| Operation | Shortcut | Description |
|---|---|---|
| Rotate 90 CW | R | Rotate the entire canvas 90 degrees clockwise |
| Rotate 90 CCW | Shift + R | Rotate the entire canvas 90 degrees counter-clockwise |
| Flip horizontal | Toolbar button | Mirror the image left-to-right |
| Flip vertical | Toolbar button | Mirror the image top-to-bottom |
Rotation changes the canvas dimensions (width and height are swapped). The zoom level adjusts to fit the new dimensions automatically.
Zoom and Pan
Control the view of the canvas without modifying the image.
| Action | Method |
|---|---|
| Zoom in/out | Ctrl/Cmd + scroll wheel, or toolbar buttons |
| Pan | Hold Space and drag |
| Zoom to fit | Toolbar button (auto-fits on open) |
| Zoom to 100% | Toolbar button |
The current zoom percentage is displayed in the toolbar.
Toolbar Options
Color Picker
Click the color swatch to open the browser's native color picker. Enter hex values or use the visual picker to choose any color. The default drawing color is a warm dark gray (#44403c).
Stroke Width
Adjust line thickness:
- Slider control from 1 to 50 pixels
- Affects brush, eraser, line, arrow, rectangle, circle, and anonymize tools
- Press ] to increase by 2, [ to decrease by 2
Font Size
When the Text tool is active, a font size input appears in the toolbar. The default font size is 16 pixels. This control is independent of the stroke width slider.
Opacity
Control transparency of annotations:
- Slider from 0% to 100%
- Affects all drawing tools
- Press Shift + ] to increase by 10%, Shift + [ to decrease by 10%
Zoom and Pan
Navigate around the canvas, especially at high zoom levels.
| Control | Action |
|---|---|
| Zoom In button | Increase zoom by 10% |
| Zoom Out button | Decrease zoom by 10% |
| Fit button | Fit the image to the editor viewport (capped at 100%) |
| 100% button | View at actual pixel size |
| Ctrl/Cmd + scroll | Zoom in/out centered on the cursor |
| Hold Space + drag | Pan the canvas (works with any tool active) |
The zoom range is 10% to 800%. The current zoom level is displayed as a percentage in the toolbar.
Undo/Redo
Fix mistakes with full undo support:
| Action | Shortcut |
|---|---|
| Undo | Cmd/Ctrl + Z |
| Redo | Cmd/Ctrl + Shift + Z or Cmd/Ctrl + Y |
| Save as new clip | Cmd/Ctrl + S |
The editor maintains up to 50 undo steps within a strict 100 MB budget for undo/redo snapshots. The active canvas and the eraser's aligned source image are separate working buffers. Large images may therefore retain fewer undo steps. No-op clicks are not recorded, and the redo stack is cleared only when pixels actually change. Undo and redo support operations that change canvas dimensions, such as crop and rotate.
Keyboard Shortcuts
Every tool and common action has a keyboard shortcut.
Tool Shortcuts
| Shortcut | Tool |
|---|---|
| B | Brush |
| E | Eraser |
| L | Line |
| W | Arrow |
| U | Rectangle |
| O | Circle |
| T | Text |
| I | Eyedropper |
| V | Select |
| X | Anonymize |
| C | Crop |
Action Shortcuts
| Shortcut | Action |
|---|---|
| Cmd/Ctrl + Z | Undo |
| Cmd/Ctrl + Shift + Z | Redo |
| Cmd/Ctrl + Y | Redo (alternative) |
| Cmd/Ctrl + S | Save as new clip |
| R | Rotate 90 CW |
| Shift + R | Rotate 90 CCW |
| ] | Increase brush size |
| [ | Decrease brush size |
| Shift + ] | Increase opacity |
| Shift + [ | Decrease opacity |
| Enter | Confirm crop or selection |
| Esc | Cancel pending text, crop, or selection; press again to close |
| Cmd/Ctrl + A | Select all (Select tool) |
| Cmd/Ctrl + C | Copy selection (Select tool) |
| Cmd/Ctrl + V | Paste selection (Select tool) |
| Delete / Backspace | Delete selection (Select tool) |
| Cmd/Ctrl + 0 | Zoom to fit |
| Cmd/Ctrl + 1 | Zoom to 100% |
| Cmd/Ctrl + + / - | Zoom in / out |
| Hold Space + drag | Pan canvas |
| Ctrl/Cmd + scroll | Zoom around the pointer |
Workflow Example
Annotating a Screenshot
- Paste your screenshot into mahpastes
- Open the context menu and select Edit
- Press U for the Rectangle tool and draw around the area of interest
- Press T for the Text tool and add a label
- Adjust colors if needed for visibility
- Click Save to overwrite or Save As to create a new annotated clip
Creating a Bug Report
- Capture the bug as a screenshot
- Open in editor
- Use red rectangles (U) to highlight the problem area
- Add text annotations (T) explaining the issue
- Use arrows (W) to point at specifics
- Save and copy path to attach to bug report
Redacting Sensitive Information
- Open the image in the editor
- Press X for the Anonymize tool
- Choose Pixelate or Blur from the context toolbar
- Switch between Brush mode (paint freehand) or Rectangle mode (drag a box)
- Anonymize names, emails, or other sensitive content
- Save -- the anonymization cannot be reversed
Saving Changes
Save (Overwrite)
Click Save to overwrite the original clip with your edits. The original clip's content is replaced in place. The filename remains the same.
Save as New Clip
Click Save As (or press Cmd/Ctrl + S) to create a new clip with your annotations. The original clip is preserved unchanged, and the new clip is saved with _edited appended to the filename.
The editor keeps JPEG, PNG, and WebP when the embedded browser supports the requested encoder. Other formats, including GIF, BMP, and SVG, are rasterized to PNG. The saved filename extension is normalized to the actual encoded format, including for Save As names. JPEG export applies a white background; PNG and WebP preserve transparency.
Images larger than 4000 pixels on either dimension are resized to a maximum 4000-pixel working copy. The editor shows the original and working dimensions in the header. In-place Save is disabled until the image has actually changed, so merely opening a large or lossy image cannot overwrite it.
Visible pending text, crop, and selection operations are applied before Save or whole-image transforms. Pressing Undo while one of those operations is still pending cancels it first.
Cancel
Click the close button (X) or press Esc to close the editor. If the image has changed since you opened it, mahpastes asks you to confirm before discarding the unsaved changes. Undoing all edits back to the original image lets you close without a prompt.
Tips
Visibility
- Use contrasting colors against the image
- Use the Eyedropper (I) to match colors already in the image
- Increase stroke width for small images
Annotation Style
- Keep annotations minimal and focused
- Use consistent colors for similar annotations
- Red for errors/problems, green for correct, blue for information
Performance
- Very large images may be slower to edit
- Complex annotations (many shapes) are still performant
- The undo stack is capped at 100 MB of memory to keep things responsive
Touch Support
The editor supports touch drawing on touchscreen devices. Touch events are mapped to the same drawing tools. Shift-snap for the Line and Arrow tools is not available via touch.
Limitations
- Canvas max 4000px: Larger images use an explicitly indicated, downscaled working copy
- No layers: Annotations are flattened on save
- Raster only: SVG images are rasterized for editing
- Single text line: The Text tool commits a single line per placement -- for multiline text, place multiple text annotations
For complex image editing needs, use a dedicated image editor and import the result into mahpastes.